
Ninja Woodfire Pulled Pork brings together dark barbecue bark, tender shredded pork, and a sweet, tangy finish. A bone in Boston butt gets a generous coating of Dad Rub 1.3, then smokes low before the heat increases to finish the cook. Barbecue sauce and apple cider vinegar bring everything together after a long rest.
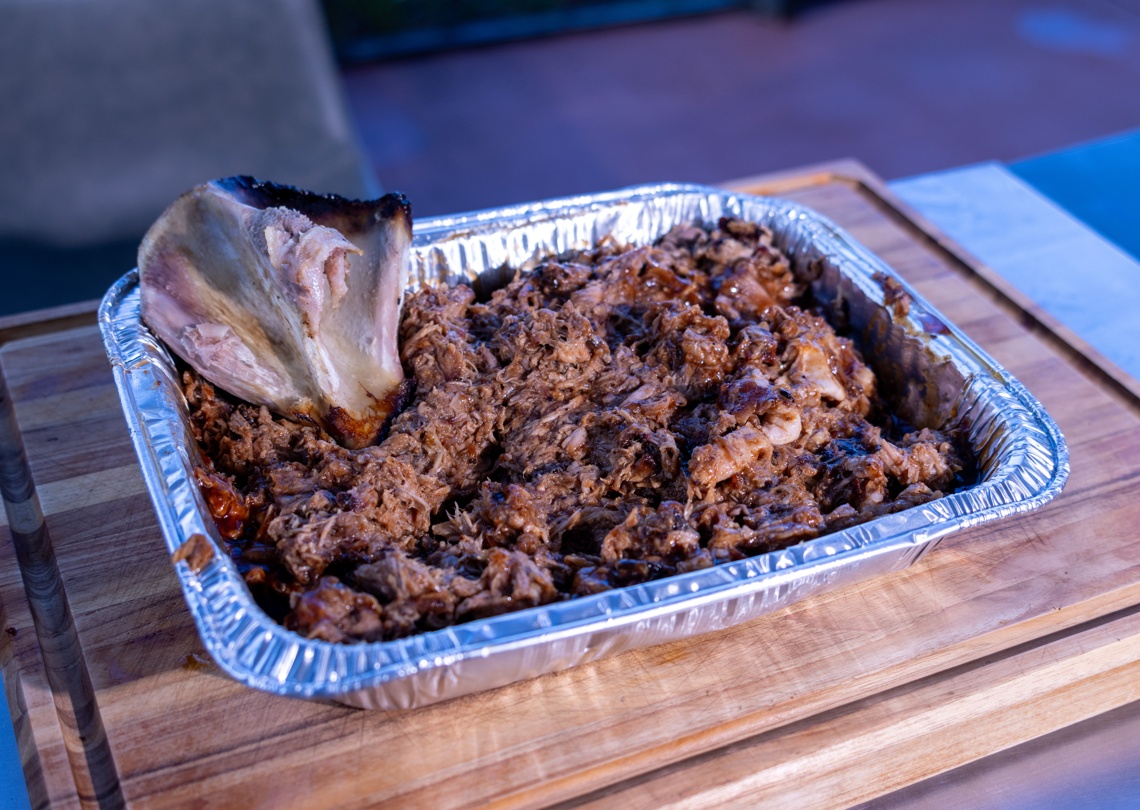
This recipe keeps the seasoning straightforward and gives you clear signs to look for as the pork cooks. The bark should hold its coating, and the probe should slide into the meat like going into a jar of creamy peanut butter. Those checks matter more than reaching one specific internal temperature. Allow plenty of time for both cooking and resting, and let tenderness determine when the pork comes off the grill.
This Page Contains Affiliate Links. For more Info See My Disclosures here.
Ninja Woodfire Pulled Pork
Equipment
- Ninja Woodfire
- Elevated Rack
- Quarter Sheet Baking Pan
- Meat Probe Thermometer
- Cutting Board
- Heatproof Gloves
- Vinyl Gloves
Ingredients
Pork And Seasoning
- 6.7 LB Bone In Boston Butt Roast
- 3 tablespoon Diamond Crystal Kosher Salt Estimated amount; aim for a nice light, even coat on all sides.
- 1 tablespoon 16 Mesh Black Pepper Estimated starting amount; adjust to your preferred pepper heat.
- ¼ Cup Dad Rub 1.3 Salt Free BBQ Rub A generous coating, plus more after scoring. See Note for Recipe.
Spritz
- ½ Cup Water For the spritz.
- ½ Cup Apple Cider Vinegar For the spritz; separate from the finishing vinegar.
After Shredding
- 18 OZ BBQ Sauce One standard bottle of generic sweet BBQ sauce.
- ¼ Cup Apple Cider Vinegar For mixing into the shredded pork
Instructions
Prepare And Cook
- Fill the Ninja Woodfire pellet hopper with your favorite pellets. Preheat on the smoker setting to 225°F (107°C).
- Pat the pork dry. Season all sides with the salt, pepper, and a generous coating of Dad Rub 1.3. Score the fat in a crosshatch about ¼ inch deep and work a little more rub into the cuts.6.7 LB Bone In Boston Butt Roast, 3 TBSP Diamond Crystal Kosher Salt, 1 TBSP 16 Mesh Black Pepper, ¼ Cup Dad Rub 1.3 Salt Free BBQ Rub
- Place the pork fat side down on an elevated rack over a quarter sheet pan to catch the juices. Insert a probe into the center of the meat, avoiding the bone.6.7 LB Bone In Boston Butt Roast
- Smoke at 225°F (107°C) for 1 hour.6.7 LB Bone In Boston Butt Roast
- Increase to 275°F (135°C) and cook until the bark is set, about 4 to 5 hours. The bark should stay in place rather than rub off when touched.6.7 LB Bone In Boston Butt Roast
- Check for probe tenderness at the 4 to 5 hour mark of this stage. The probe should slide into the meat like going into a jar of creamy peanut butter. If the pork is not tender and the bark looks dry or crusty, combine ½ cup water and ½ cup apple cider vinegar and spritz to wet the exterior.6.7 LB Bone In Boston Butt Roast, ½ Cup Water, ½ Cup Apple Cider Vinegar
- Continue at 275°F (135°C) until probe tender, about 1 to 2 hours more if needed. Check several areas, including the center. Use tenderness to determine when it is done.6.7 LB Bone In Boston Butt Roast
- Remove the pork and wrap tightly with the captured juices. Rest for 1 to 2 hours, allowing the pork to cool to around 145 to 150°F (63 to 66°C) before pulling.6.7 LB Bone In Boston Butt Roast
- Remove the bone and shred the pork, mixing in the bark and juices. Add the BBQ sauce and ¼ cup apple cider vinegar. Mix thoroughly and serve.6.7 LB Bone In Boston Butt Roast, 18 OZ BBQ Sauce, ¼ Cup Apple Cider Vinegar
Video
Notes
½ Cup Granulated Garlic
½ Cup Granulated Onion
¼ Cup Smoked Paprika
¼ Cup Espresso Ground Coffee
1 Tablespoon Monosodium Glutamate (MSG)
1 Tablespoon Ground Mustard
1 Teaspoon Ground Cinnamon
1 Teaspoon Ground Ginger Mix all ingredients until evenly combined. Apply generously, seasoning the meat with salt and black pepper separately.
Nutrition
 Tried this recipe?Mention @DadGotThis or tag #DadGotThis!
Why Make Ninja Woodfire Pulled Pork?
A Boston butt gives you a substantial piece of meat to season and smoke, with plenty of surface for a flavorful bark. This recipe uses a 6.7 pound bone in roast. The finished pork combines that seasoned exterior with the meat inside, so the bark becomes part of every pan of shredded pork rather than a separate crust left behind.
The cooker setup also keeps the juices close at hand. An elevated rack sits over a quarter sheet pan, which catches the drippings for the rest and the final pull. Meanwhile, the meat side faces up and the fat side faces down. This leaves the upper meat surface exposed while the fat faces the heat below.
Seasoning Without Guessing About Salt
Dad Rub 1.3 has no added salt or black pepper, so those seasonings go on separately. That gives you room to apply the sweet rub generously without increasing the salt and pepper every time you add more. The rub contains brown sugar, coffee, paprika, garlic, onion, mustard, and other seasonings, while the separate pepper keeps its heat adjustable.
For this roast, start with 3 tablespoons of Diamond Crystal kosher salt and 1 tablespoon of black pepper. The salt is an estimated amount for a light, even coating across all sides. It is specific to Diamond Crystal, since different salts do not weigh the same by volume. Likewise, the pepper amount is a starting point: use less for a milder result or more if you enjoy a stronger pepper flavor.
Building Bark on Ninja Woodfire Pulled Pork
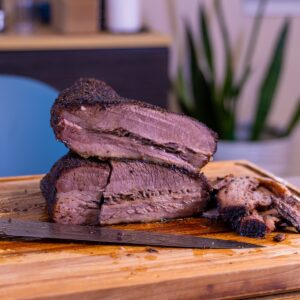
Bark gives this recipe its dark exterior and concentrated coating of seasoning. Leave the pork exposed while that surface develops, and look for more than color alone. A set bark stays in place rather than rubbing away easily when touched. That is the useful distinction between a surface that is merely getting darker and one that has formed the coating you want.
Once the bark has developed, check its texture as well. If it looks dry or crusty and the meat still needs cooking, the water and apple cider vinegar spritz can wet the exterior. Use enough to moisten the outside rather than treating the entire batch as a required addition. The spritz is there for the surface; the measured finishing vinegar belongs in the shredded pork later.
Tenderness Is the Finish Line
The thermometer helps you follow the cook, but probe resistance tells you whether the pork is ready to pull. Test several places, including the middle. The probe should slide in with the easy resistance of creamy peanut butter. If you still need to push firmly through the meat, give the roast more time and check it again.
Plan for roughly 6 to 8 hours of cooking for this recipe, with additional time for the rest. That range is an estimate rather than a deadline. A pork butt that is still firm needs more cooking even if dinner is approaching. Similarly, once the meat is probe tender, move on to the rest instead of keeping it cooking just to satisfy a planned number of hours.
When to Wrap the Pork
Wrapping during cooking is optional. If the bark has set around 165°F (74°C), you can wrap the roast to help speed up the cook. However, reaching that temperature alone is not the cue to cover it. Check the bark first so the seasoning has formed the exterior you want before making that choice.
Wrapping for the rest is a separate part of this recipe. Once the meat is probe tender, wrap it tightly with the captured juices and allow 1 to 2 hours before pulling. Let the pork cool to around 145 to 150°F (63 to 66°C). This gives it time to rest and makes it easier to handle and shred than pork straight off the cooker.
Sauce, Tang, and the Final Mix
After removing the bone, pull the meat apart and mix the bark and juices through the pork. You can enjoy the pork at this stage, or finish it with the sauce and vinegar listed in the recipe. A generic sweet barbecue sauce works here, so use the one you like rather than searching for a specific brand.
One standard 18 ounce bottle provides the sauce amount for this roast. The additional quarter cup of apple cider vinegar adds the tang that goes alongside the sweet sauce. Keep that finishing vinegar separate from the half cup used to make the spritz. Finally, mix thoroughly so the sauce, vinegar, bark, and meat are distributed throughout the pan. The result is ready to serve, with both the seasoned exterior and tender pork in each portion.
Ingredient and Equipment Links:
Use Dad's Affiliate Link & get your own Ninja Woodfire Pro Connect Outdoor Grill: Ninja Woodfire Pro Connect Outdoor Grill
Did you know Dad is on YouTube?
Go check out Dad's YouTube channel for all kinds of great cooking videos and food related content.
Leave a Reply